Buying Hand Tools for Woodworking
20 Woodworking Hand Tools to Get Started in Traditional Hand Tool Woodworking
By Joshua Farnsworth | Updated Feb 8, 2022
Buying Hand Tools for Woodworking

20 Woodworking Hand Tools to Get Started in Traditional Hand Tool Woodworking
By Joshua Farnsworth | Updated Feb 8, 2022
“Are you confused about which hand tools to buy for woodworking? Below you’ll see links to each of my Hand Tool Buyer’s Guide articles. And at the bottom of this page you can read my article about which 20 Woodworking Hand Tools You Should Buy First. Thanks for stopping by, and enjoy!”
– Joshua Farnsworth
Which 20 Woodworking Hand Tools Should You Buy First?
By Joshua Farnsworth
I created the above hand tool buyer’s guides to help beginners who feel overwhelmed when trying to understand which hand tools they need first. It’s frustrating! Below you’ll see my summary list of the 20 basic professional woodworking hand tools that you should start to accumulate in order to start building the most basic woodworking projects. When you’re ready, you can follow the yellow buttons to visit each of the buying guides for each type of hand tool, to get help with understanding hand tool features, brands, & models. At the bottom of this page is a handy full list of tools that is sorted by “urgent”, “semi-urgent”, and “not-urgent” to buy.
1. Build or Purchase a Solid Wooden Workbench
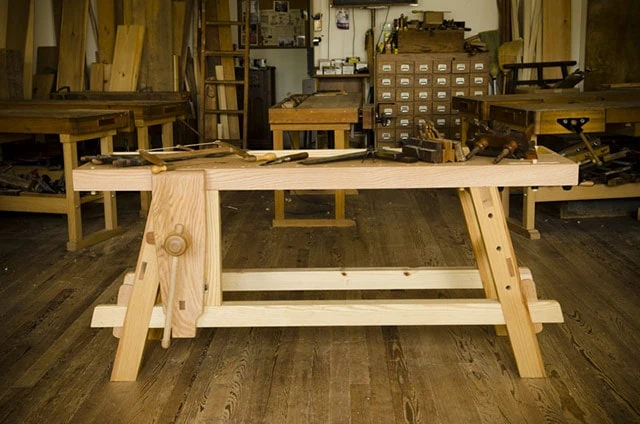
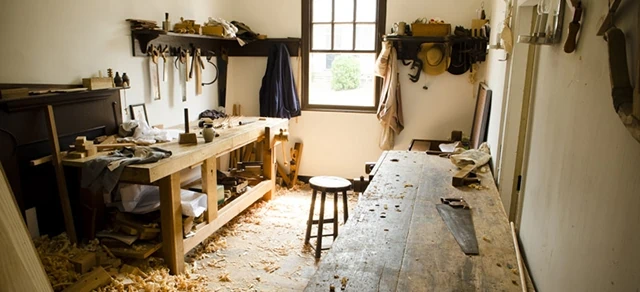
A wooden workbench has always been the center of a traditional woodworker’s workshop. If you’re really on a tight budget you can get away with almost anything that allows you to secure your wood in place for handplaning and sawing, and use clamps to secure your workpiece.
However, I would recommend that you either build a wooden workbench, or purchase one if you feel a workbench build is too advanced for you right now. However, I created the DVD (and streaming version) of “Building the Portable Moravian Workbench with Will Myers” so that even beginners can build a solid, portable, and very affordable workbench that will fit almost anywhere, using mostly or only hand tools. You can buy it in my store here. You can find Will’s free workbench plans for the Moravian Workbench here. Whichever path you choose, make sure you choose to either build or buy a heavy & sturdy wooden workbench, with at least a 3″ solid top, strong supportive base legs, and at least one strong vise. My workbench guide goes into much more detail on how to choose a wood work bench.
2. Buy a Jack Plane
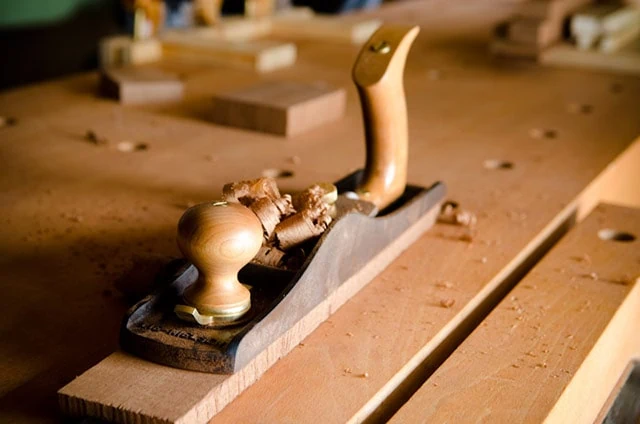
A Jack Hand plane is a middle size “bench plane” (i.e. planes that are used so often that they are usually on your workbench). If you’re on a budget a jack plane can temporarily be used in place of other planes that perform specialized functions: (1) rough stock removal (if you buy a second iron/blade and shape it with a curved “camber”), (2) jointing board edges (as long as the board isn’t over 3x the length of your jack plane), and (3) smoothing the boards.
You’ll eventually want to purchase a dedicated smoothing plane and jointer plane, but a Jack Plane will let you get started working! A new and sharp low angle Jack Plane would be ideal for beginners and professionals who aren’t up for rehabbing a handplane.
3. Buy a Block Plane
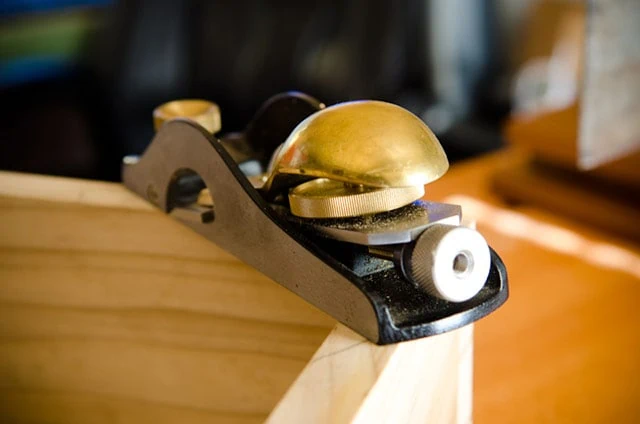
Block planes have become one of the most oft-used tools in a woodworker’s workshop. Some traditional woodworkers even keep them in their aprons! These little planes can be used to trim your joints, put chamfers on board edges, trim end grain, etc. I would recommend finding a low angle block plane, because the low angle lets you cut difficult grain more easily. My handplane buying guide goes into more detail about the features and brands that you should look for when purchasing a good quality block plane.
4. Buy 2 Panel Saws: Rip and Cross Cut
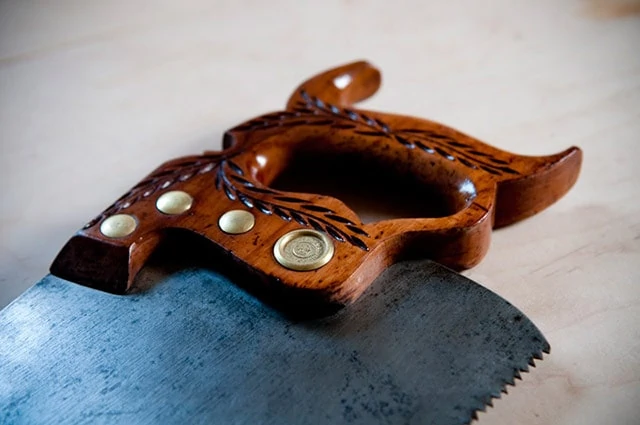
Handsaws (often called “panel saws”) are long, thin saws with a comfortable wooden handle. They are used for rough dimensioning of your lumber. Although a “panel saw” is technically a smaller handsaw that fits into the panel of a tool chest, I’ll hereafter refer to this type of saw as a “Panel Saw” to differentiate them from the broad category referred to as “hand saws”. Panel saws come in two tooth configurations: “Rip” (cuts along the grain…like a chisel) and “Cross Cut” (cuts across the grain…like a knife). You will need both.
Panel saws can be quite affordable (often as little as $5 a piece), but you need to know what you’re looking for and be willing to spend some time learning to sharpen hand saws. My hand saw buying guide will help you know which brands & models to look out for at your local flea markets or on eBay.
5. Buy 1-3 Back Saws
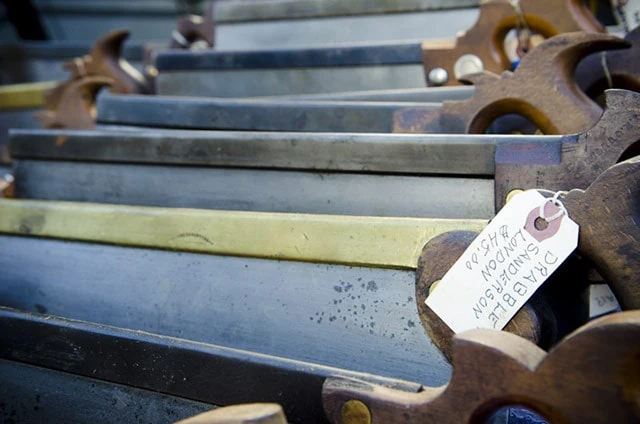
Unlike panel saws, “back saws” are used for fine accurate work when making wooden joints (like dovetail joints). The thin metal saw plates are made stiff with steel or brass “backs” that run along the top of the saw plate.
If you’re on a tight budget, you can get by with just a dovetail saw for awhile. But if you have the means, then I’d recommend that you purchase three backsaws: (1) a dovetail saw, with fine rip teeth, used for cutting joinery along the grain (like dovetails), (2) a “carcass saw” used for cutting across the grain (fine cross cut teeth), and (3) a larger tenon saw used for cutting deeper cuts, like tenon cheeks, along the grain (rip teeth). All three saws are used very, very often in my workshop. As mentioned above, you could certainly get by with just a dovetail saw at first, since the small rip teeth don’t do too bad of a job at cutting across the grain. Buying backsaws can be very confusing because most sellers don’t know what saw they have, and the tooth configuration can change the job of the saw. Most people that sell antique saws mix the names up, so don’t worry. My buyer’s guide really clears this confusion up and will help you know what to look for.
6. Buy a Miter Box and Miter Saw
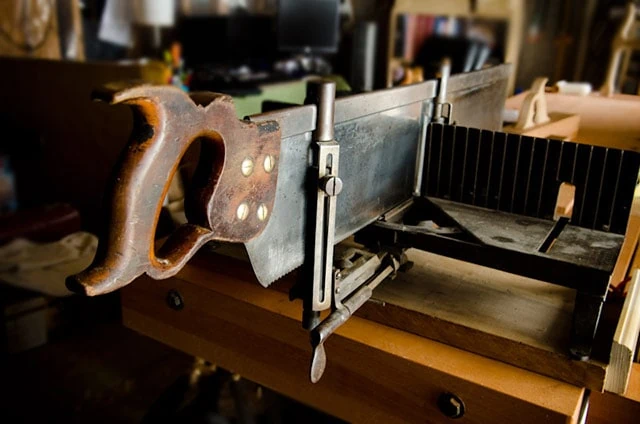
A good miter box & miter saw (a very large backsaw) will enable you to cut your wood to very accurate lengths, at accurate angles. This will especially save you a lot of time in trying to square your board ends. The long miter saw glides back and forth through a rigid saw frame.
The frame’s angles can be changed to enable you to cut perfect miter joints (the joint used for picture frames) and many other joints. I use my miter saw quite often. I’ve bought them used for as little as $15, but expect to pay more than that.
7. Buy a Coping Saw
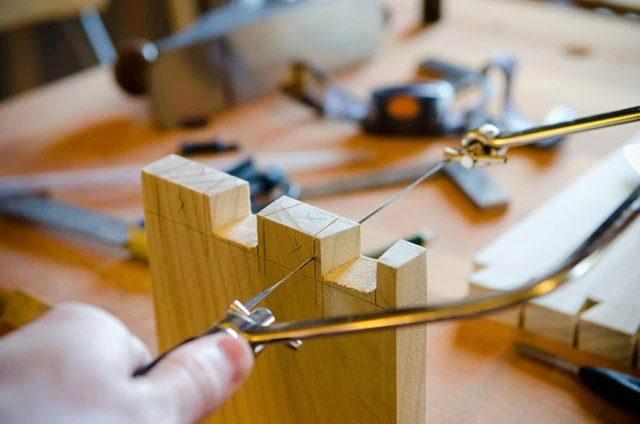
The very affordable coping saw (usually under $20) is regularly used for rough cutting shapes in the board, but especially for removing waste from dovetail joints (one of the most common wood joints). An affordable coping saw will work just fine, along with a pack of affordable replacement blades. Read my hand saw buying guide for more detail on brands & features to look for when purchasing a coping saw.
8. Buy a Bench Chisel Set
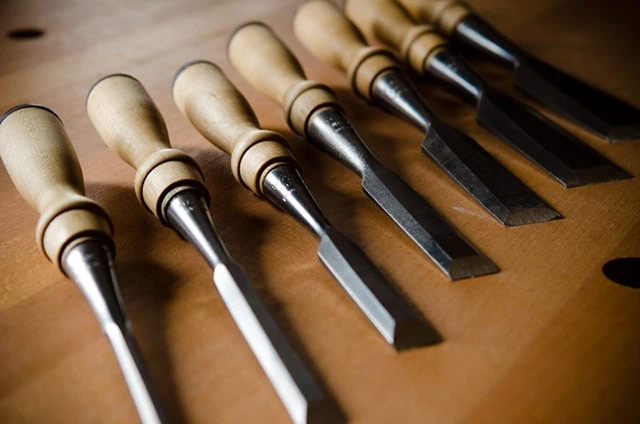
I use chisels perhaps more than any other tool in my workshop, so it’s a good idea to not cheap out here. A high quality set of bevel edge bench chisels (new or vintage) will last you many years (likely your entire life) and will be used on nearly every project. I’ve used some decent affordable plastic handle bench chisels, but highly prefer lighter wooden handle chisels with excellent steel.
A good set of 5-7 bench chisels (they don’t have to match) will get you going right away. Down the road you’ll eventually add some specialty chisels (like paring chisels, fishtail chisels, etc) but bench chisels will work for just about everything. I often pay only $10 for high quality vintage chisels, so a compiled set can certainly be affordable, and higher quality than low quality new sets. Read the chisel buying guide to learn what chisels to avoid and which chisels will work great.
10. Buy a Mortise Chisel
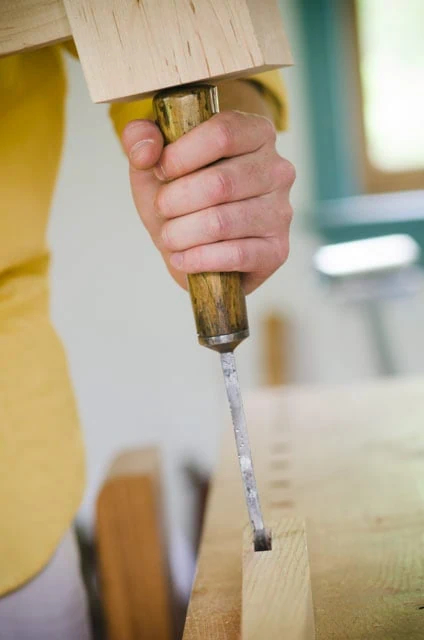
To start off you only need either a 1/4-inch or 3/8-inch mortise chisel (or some size close to those). I prefer 3/8-inch. You don’t need a whole set of mortise chisels. Mortise chisels (also spelled “mortice chisels”) are used for chopping mortises (rectangular holes) into the side of your board to accept the insertion of a tenon. “Mortise and Tenon” is a very common and very strong joint that most people have heard of.
I prefer the English style “pig sticker” mortise chisels because of their strength, weight, and the feel of the oval handle. My chisel buying guide shows where to find these chisels and what to look for when buying them.
10. Buy a 6-inch Combination Square
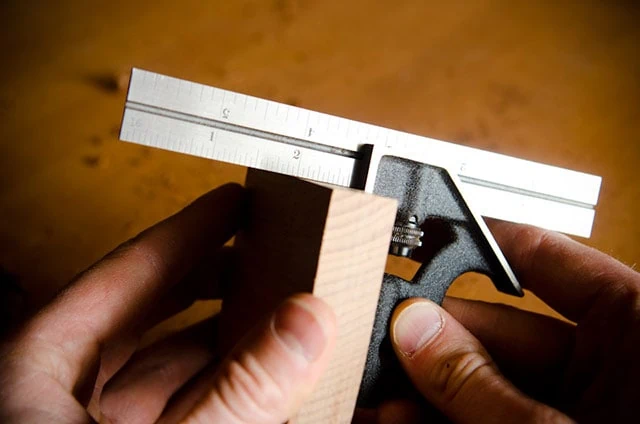
A combination square is a very useful and accurate adjustable square that lets you check boards for squareness, take precise measurements, and take depth adjustments of mortises and other wood joints. This is one of my most used hand tools in my workshop. Especially the small 6-inch combination square.
So what is the difference between a $10 combination square and a $100 combination square? I dive into that in my full article on buying squares and other marking gauges:
11. Buy or Build a Try Square
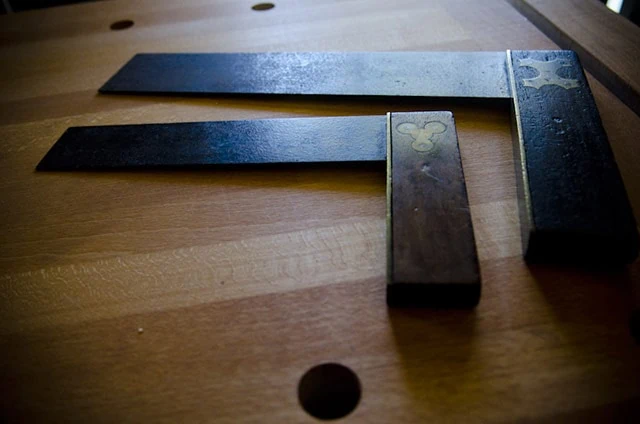
A try square is used to square up your workpieces for precise-fitting joints. If you’re not confident enough to build your own try square yet, you should purchase a good metal try square (somewhere between 9 and 12 inches). It’ll be used for scribing square lines around the faces and edges of your boards, such as a line for where to cut with your saw.
Most try squares that I’ve found (used or new) are actually not a perfect 90 degrees, or “square”. But you can use a file to bring it back to square. My marking & measuring buying guide explains how to check a square and also how to fix one that is “out of square”.
12. Buy a Sliding Bevel Square
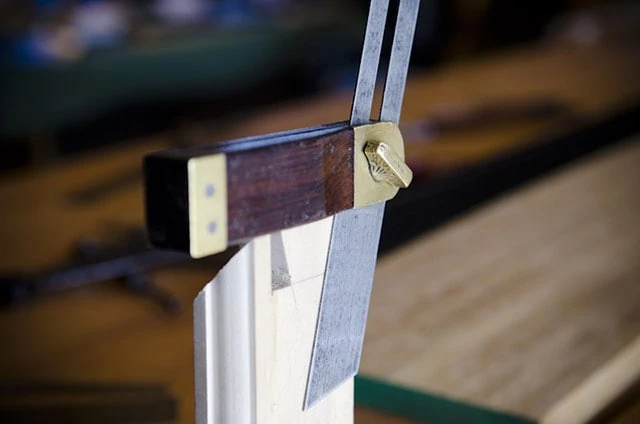
A sliding bevel square (or “bevel gauge”) is used for scribing angles on your workpiece. Once set, a good sliding bevel square should be able to repeat that angle over and over again, like when you are laying out dovetails on a board face.
Not all sliding bevel squares are good at holding that angle, so make sure you read more in my marking & measuring buying guide before you purchase a bevel gauge.
13. Buy a Pair of Dividers (Compass)
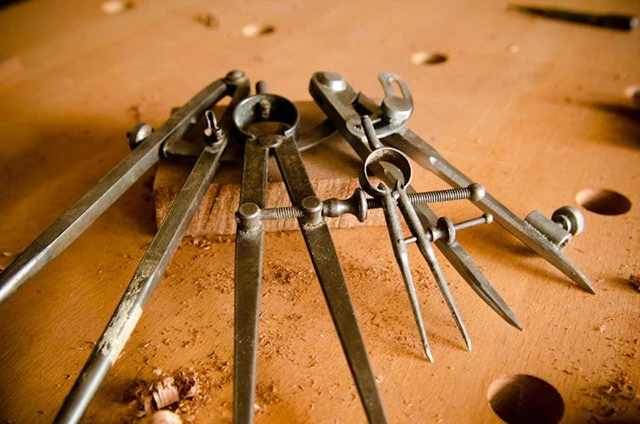
Dividers (or compass) are used for taking and repeating a measurement over and over again on a work piece. Traditional woodworkers rarely take measurements with a tape measure when doing fine joinery work, but rather take a measurement with dividers then transfer that arbitrary (yet accurate) measurement to another work piece. This removes a degree of inaccuracy.
Dividers are also used for scribing arcs and much more. You should definitely have at least one “pair” of dividers (one compass), somewhere between a 6-inch and 9-inch size. Also having a small pair of dividers (like 3-inches) is helpful, so I can store more than one measurement at a time.
14. Buy or Build a Marking Gauge
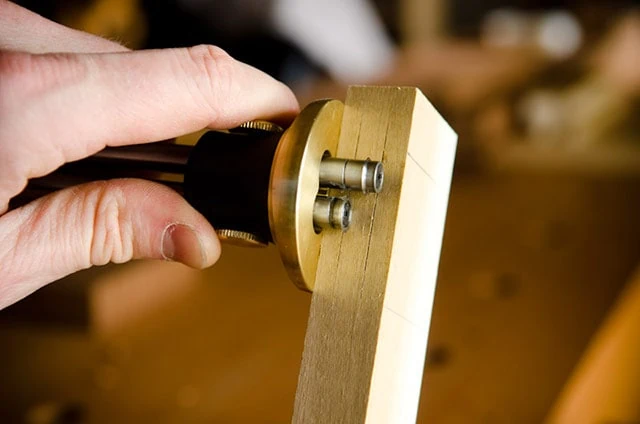
Like dividers, marking gauges are used for transferring a measurement and repeating it over and over again. A locking mechanism keeps the gauge from slipping and loosing that measurement. You cannot successfully build furniture without at least one good sturdy marking gauge.
I really like marking gauges that cut (or slice), especially the more modern wheel cutting marking gauges. Having a mortise gauge (with two cutters or pins) is very convenient, but you can definitely get by laying out mortises with just a single marking gauge.
But beware of the cheaply-made marking gauges that I mention in my buying guide. They will be useless and a waste of your money.
15. Buy a Folding Rule and/or Tape Measure
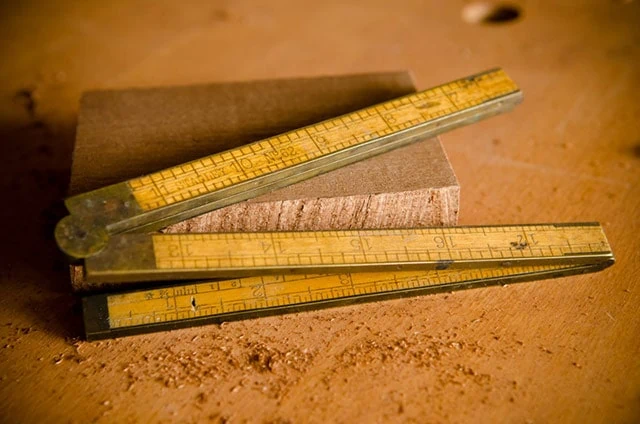
A “folding rule” (not “ruler”) is a predecessor to a tape measure, and allows you to take measurements when cutting boards, etc. If you’re on a tight budget, a small tape measure can be used for the same job, usually for rough measurement (think lumber yard). I use both.
A nice vintage 24-inch wooden rule is so handy to have because it slips into your pocket or apron and gives you quick measurements. They are pretty affordable, but you need to know what to look for so you don’t get a dudd.
16. Buy a Marking Knife
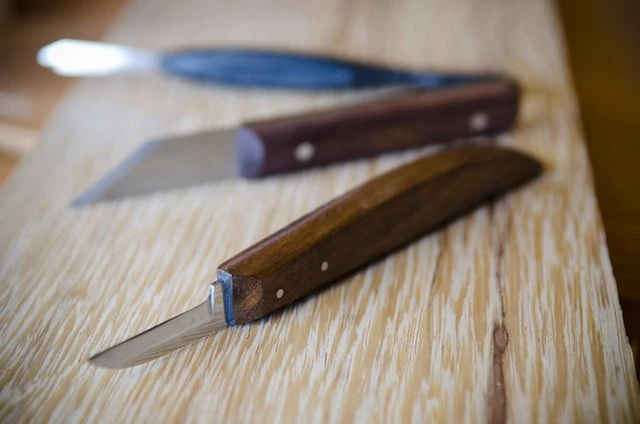
A marking knife is used for marking where you will be cutting with your saws and chisels. For getting into tight spots (like dovetails) and making very accurate lines (which is vital for tight fitting joints) you need just the right marking knife. You would think that any old knife would work, but you would be wrong. Years ago I purchased several that didn’t work well.
Marking knives can get very expensive, but fortunately I found a very affordable knife ($15) that works perfectly. Check my marking & measuring buying guide to see what to look for (and what to avoid) when buying a marking knife.
18. Build or Buy a Wooden Joiner’s Mallet
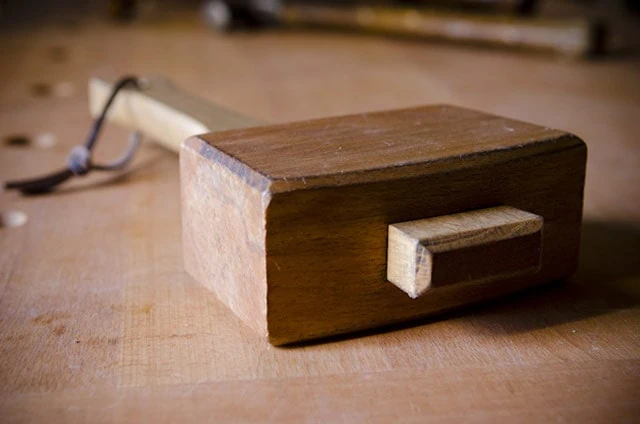
A good wooden mallet is vital for traditional woodworking. I prefer the English-style Joiner’s mallets. The lighter carver’s mallets will not be heavy-duty enough for most tasks, especially chopping on a mortise chisel.
Wooden mallets are mostly used for hitting your chisels when cutting joints (like dovetail joints or chopping mortises). You should never hit a chisel with a metal hammer. Build or buy a mallet that is made of fairly hard wood (e.g. maple, oak, beech wood, etc.), that will feel well balanced in your hand, and that gives you enough weight to chop with your chisels.
19. Buy a Rabbet Plane
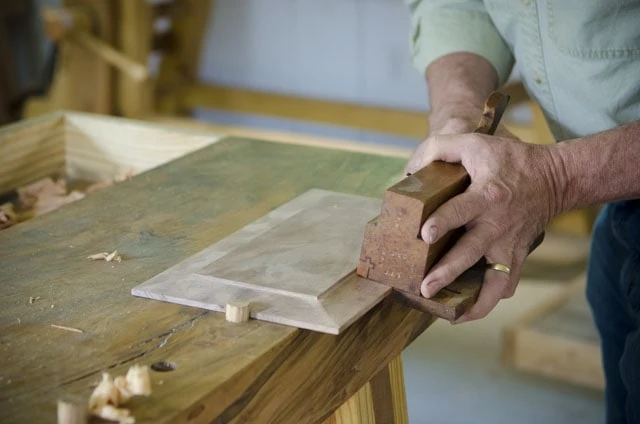
Rabbets are one of the most common joints in furniture making, so a handplane that cuts a rabbet should be toward the top of your list of tools to buy. Yes, rabbets can be cut without a handplane, but at greater difficulty. I own a lot of handplanes that cut rabbets, including wooden rabbet planes, metal rabbet planes, shoulder planes, and moving fillister planes. While I use all of them for specialty tasks, I find that a metal or wooden moving fillister plane (pictured above) is the most useful, as it allows me to cut rabbets with the grain, across the grain, and allows me to easily cut panels (as seen above). And the movable fence helps greatly with accuracy. I discuss rabbet planes in great detail in the handplane buyer’s guide.
20. Buy a few Woodworking Clamps
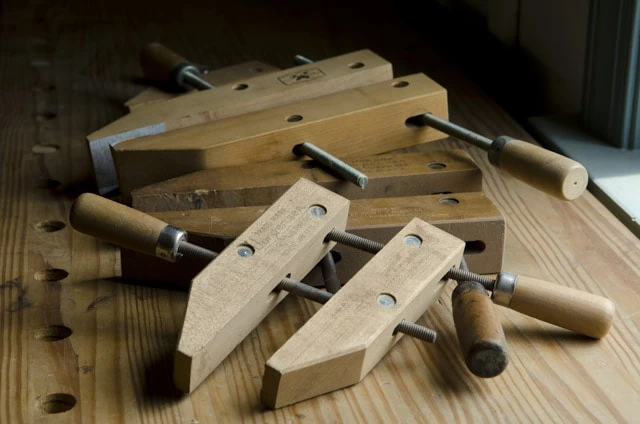
Woodworking clamps hold your freshly glued up joints together until the glue hardens. To start off with I would recommend buying at least one quality “hand screw clamp” (around 10 or 12 inches) and a few bar-type or parallel clamps.
But before you purchase clamps, build your first project and put it together without glue. Then see how many clamps you think you will need to put enough pressure in all the right spots. Then proceed to purchase that number of clamps. Repeat this process on your next project, and purchase more clamps if needed. This is better than running out and buying a huge collection of woodworking clamps. See my buying guide for different clamp types, uses, and my favorite brands.


I recently just got into traditional woodworking and came across your YouTube channel. Your videos plus the blog posts have a depth of knowledge that cannot be found anywhere else. I have been able to buy enough tools to start a workbench and I am almost complete with the build. Your video about how to square, flatten, and dimension rough boards was a life saver! Thanks again for all your knowledge. Runner-up Prize: Stanley 45 Combination Plane Mug Location: United… Read more »
Fantastic guide thanks for putting this together!
Incidentally your Topic index page needs a little tweaking. A few links go to the same page even though they’re different topics and at least one of the images takes you to some other page.
For the giveaway, here are my other choices:
– The bow saw video
– Stanley 45 Combination Plane T-shirt (Blue Dusk, 2XL)
– Stanley 45 Combination Plane Mug (Black)
– USA, Oklahoma
Thanks for the head’s up Jason! I just fixed the incorrect links.
Love this article and the videos, very informative. As a beginning woodworker I have chosen on the traditional means because I can find some good deals at local flea markets and with a little tune up the tools work good. This video give great tips for the new woodworker and the basic essentials needed for getting started. One area I need help is in clamping so I would be honored to win a set of the clamps. If I am… Read more »
When I was just starting I found this article very helpful. Thanks.
I am very interested in the Bill Anderson video.
Thanks
I have to say, reading your blog and watching your videos makes me want to get started immediately on traditional woodworking. The problem I have is that hand tools are hard to come by at swap meets or antique stores out here in Bakersfield, CA. I have made several trips and so far all I have found is a beat-up old Jack plane. I would rather buy used, but I am a little leery of EBay, so my options are… Read more »
I just found you site and from what I have seen so far is very impressive. I cannot believe it took me this long to find it. I have a question concerning the Stanley 62 folding rule that you and Chris Schwarz recommend. I checked on ebay and there seems to be a wide range in prices. Do you have any more information or a recommendation as to the where more research could be done on these rules? Also, if… Read more »
I really like this series of videos for beginners. It is a great resource for somebody like me who has some tools but is looking to put together a kit in stages.
For the giveaway my runner up choices are: The bow saw video, the brown wood and shop logo t-shirt and the Stanley 45 mug.
Thanks for being informative and keep up the good work!
Amazing site… I’m new to woodworking, at least new to making anything worth keeping, and this site you have created is fabulous! I am addicted… I have spent far to many hours on your site already! My first project is going to be a workbench… I used your other articles and videos for inspiration. My second project is going to be a dining table… so those clamps would be great! If I dont win the clamps, I would like the… Read more »
Wow, pretty big first projects! Where in Utah do you live? I used to live there.
What was the brand of hold fast you are using in your YouTube video titled hand cut dovetails?
Hi Glenn, it’s a Gramercy hold fast, as you can see more about in my hand tool buying guide: https://woodandshop.com/woodworking-hand-tool-buying-guide-workbench-tool-storage/
SAW YOUR 2 MINUTE VIDEO ON OLD MITER BOXES. AT THE END YOU SPOKE OF ANOTHER VIDEO THAT GETS INTO MORE DETAIL ABOUT DIFFERENT OLD MITER BOXES. I’M INTERESTED. WHAT IS THE VIDEO?
Hi Tom, will you please send me a link to the video/blog post you’re referring to? Sorry, but I have a lot of posts!
Nice post. All of the traditional woodworking hand tool you have covered. Your info will be helpful for beginner woodworker.
Glad you liked it Richard! Where are you writing from?
Nice to see there are people with so much profound love for what they do. Great Job! This site too!
Thanks Herman!
Thanks for this amazing information for startup these all types of tool we should have for startup woodwork’s
i relay appreciate for informative data collection great job keep it up for best i must share this content with my other woodworkers.
You’re most welcome!
Hey Joshua,
This article is unquestionably the all-in-one hand tools guide for the woodworkers! Fantastic job!
Just one thing to add: Beginners do not need all the tools you mentioned. They can start with essential tools.
I am going to share this with my woodworker mates; they will love it.
Glad you liked it!
What are the essential tools. I want to give them as a gift to my husband. :)
Hi Aline, were you able to see the list? I can help you come up with some tools, if you need.
I have been thinking of building a simple bookshelf using only hand tools as a starting wood working project. This guide gave me a good overview of what I will need. Thank you for this excellent resource!
Glad it was helpful James…we’ve got a lot of other resources you can check out: https://woodandshop.com/welcome/
I haven’t worked with hand tools since high school shop class. Years later I am using them again, thanks for the info, really helps one to get started again. Now on to making a bench.
Glad it’s helpful Phil!
I have a Stanley plane that has me baffled. It has no patents on the frog, no raised ring… It has No.2 on the bed but has no patent dates on the lateral adjustment lever. what could this mean? What type is it?
do you have a video on how to make a puzzle box
No, sorry.
Thanks Joshua! I appreciate all the information as I transition from power tools to hand tools. I would say though, not sure when you wrote these articles, but the eBay prices have gone up significantly. In some cases more than double. Still better than buying new, but not quite as attractive as under $30 for a fillister plane.
You’re welcome Sean! Yes, the Ebay prices sure shot up during the pandemic!
I am new to this woodworking, I had experience with other tools but woods are new to me, and all your articles and videos are very helpful to understand this very much. Keep making such informational resources, it helps to improve skills for beginners such as me.
Glad to hear that our website has been helpful to you Robert! Where are you from?
I am from Wisconsin.
Perfektní a přehledný
Hello Joshua
I was wondering. In your article you mentioned that you shouldn’t hit the top of the chisel with a metal hammer/mallet. Would a rubber mallet work like a wood one or do I need to get a wood mallet? Thanks.
Hi Isaak, a rubber mallet would work okay, but won’t have enough strength. Wood is best.
I have just discovered your fantastic website after watching the video on the 5 features of a good workbench : thank you SO MUCH for all you are doing, so much knowledge shared for free. I am going to start building my first workbench, using scrap wood, will share a photo when done. Once I feel more comfortable, I will use more expensive wood (oak). This page on which tools to start with is extremely useful. On chisels, over here… Read more »
I’m so glad that you’ve found our website helpful Elias! Where in Europe do you live?
I’m French, but I live in Luxembourg (a tiny country squeezed between Germany, France and Belgium)
Thank you for this site. As I am brand new to the craft I find the information you share invaluable. I tried working with Power tools but, I didn’t really enjoy it. I much prefer working with hand tools. I’m here most every day learning and researching. I have learned so much and already have saved money before even really getting started. Would love to take one of your workshops and I’ll be looking out for dates and times. Please… Read more »
I’m happy to have you here Michael, and am glad that my website has helped you so much!
OK kool thank you for the advice
The only two things I would add is a router plane and shoulder plane. I really don’t think much else is truly required at all. If you bought This list plus those, what else would you really need?
Thanks Scott! While those two planes are very useful, then aren’t 100% required to get started, as there are other ways to accomplish what those planes accomplish. But a router plane would be the next tool to get.
You’re right I didn’t mean to say those two were needed. Just that in my experience those two coupled with the list provided here would set you up well for anything, not merely getting started. Big fan. Cheers.
I don’t see the promised list of tools categorized by urgent, semi-urgent etc.
Sorry, a technical glitch caused the list to disappear!
I am a 12 years old carpenter working in South sudan under somebody workshop wanted to open my own workshop at the beginning of 2023 how will I purchase and receive my preliminary startup tools I am in South sudan in Eastern part of the country in a town call Torit do you guys have any authorised delealers in South sudan
My request are no.6 and 5 jackplane, set of wooden Chelsea, 7 and 5 feed size clamp, rebit plane, electric router and set of bits, jigsaw, angle grinder, drilling machine electrical and betery dril, tri square, 2 f clamp circular saw and hand saw 2 pcs and claw harmers 2 it will be a pleasure when ur company respond to my order with all details of the price of each items mentioned in the page