Introduction to Buying Supplies for Finishing, Sanding & Scraping
By Joshua Farnsworth
Finishing a lovely piece of furniture that you just built is one of the most satisfying parts of woodworking. It can also be one of the most frustrating and costly if you don’t know what you’re doing. In this guide I’ll be discussing types of wood finishes, and how they compare in beautifying and protecting your furniture. I’ll also discuss different tools and products for preparing the surface of your furniture, giving it a lovely & protective finish, and keeping it looking good for years to come.
1. Buying Products for Preparing the Wood
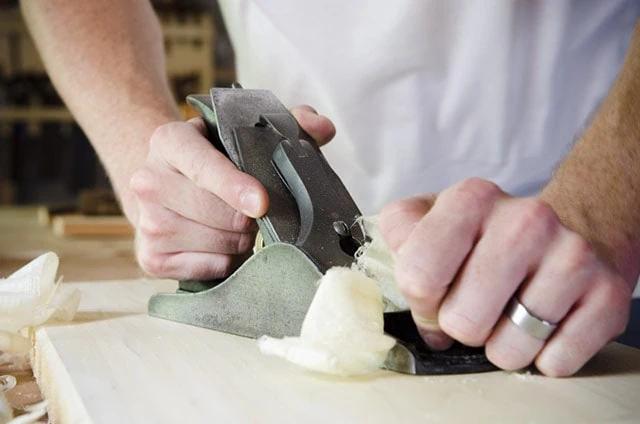
For a piece of furniture to feel smooth, and for a wood finish to go on properly, the surface of your furniture must first be made smooth. All woodworkers have their different methods for preparing the wood’s surface, but I start with a normal smoothing handplane. If I get tearout from difficult rain, then I next try a smoothing plane with a higher effective angle blade (I’ll discuss this below). If that doesn’t stop the tearout, I next move onto a scraper plane (for big surfaces) or a card scraper (for smaller surfaces). If those don’t prevent tearout, then I work with sandpaper. I’ll discuss each of these surface prep options below.
Buying Smoothing planes
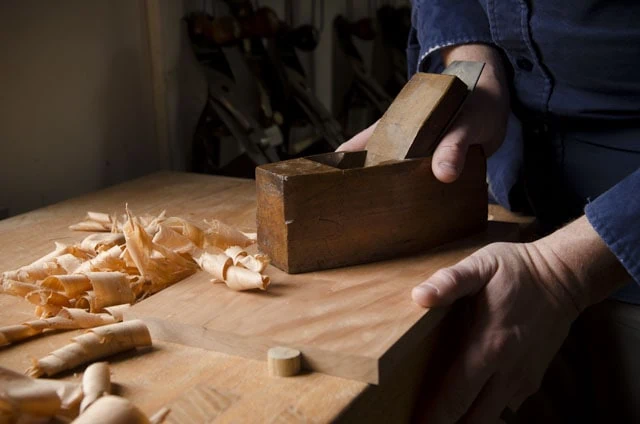
Under the right conditions a smoothing plane is the ultimate finishing tool. That is, if the wood grain cooperates and if the smoothing plane is perfectly sharpened and well-tuned. The way the smoothing plane shears the wood fibers leaves it smoother than sandpaper can. The way a handplane sheers the wood fibers provides greater clarity, iridescence, and contrast when the wood finish is applied. Handplaning also saves me money on sandpaper, and it produces nice shavings rather than wood dust (which can cause respiratory problems). And under most conditions, it is by far the fastest way to get a smooth surface. Just a few passes with a smoothing plane will prepare the surface for adding a finish. Whereas with sandpaper, you have to gradually move up through grits until you’ve obtained a smooth surface.
For finish work, a smoothing plane should be set to take as thin a shaving as possible. Aside from the adjustments on the handplane, a thin shaving is accomplished primarily with a very sharp blade, and secondarily with a tight plane mouth. And to prevent “plane tracks”, the sharp corners of the blade should also be removed with “cambering” (a very slight radius). The angle at which the blade (i.e. “plane iron”) cuts the wood is also an important consideration, which I’ll now discuss.
What Blade Angle for Finishing with Smoothing Planes?
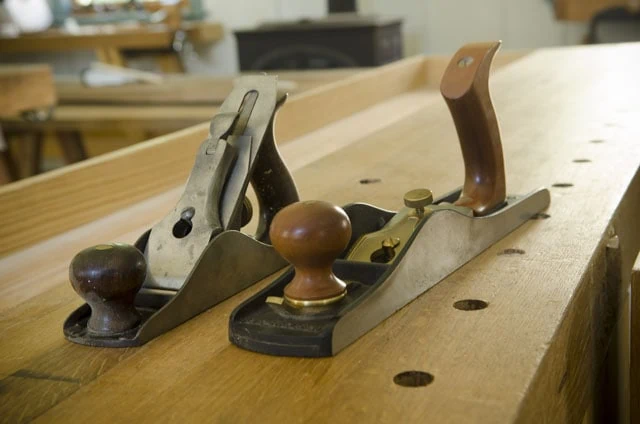
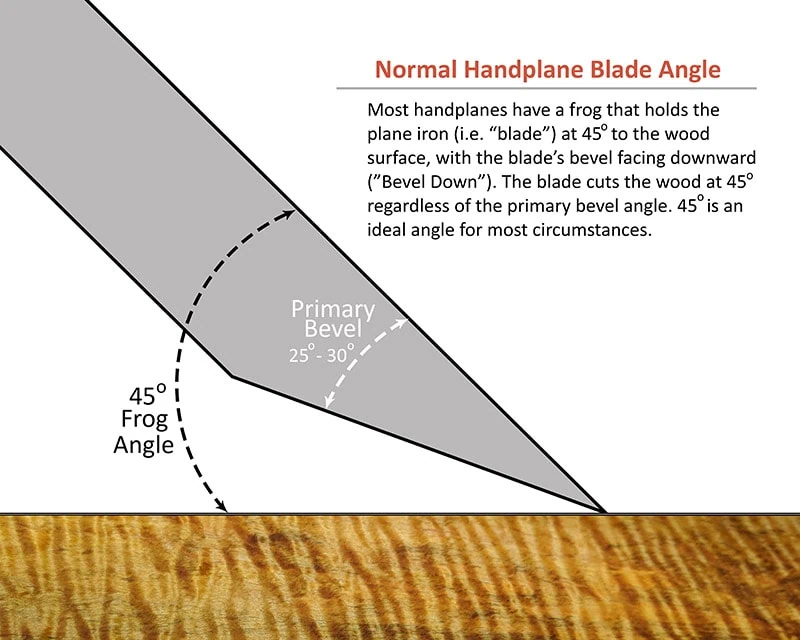
The leading edge of the plane blade determines what angle the wood will be cut at. For “bevel-up” handplanes (like a low-angle jack plane or low-angle block plane), the bevel is the leading edge. For “bevel-down” handplanes (like most normal bench planes) the back of the blade is the leading edge, so whatever angle the frog holds the blade at, that will be the cutting angle (usually 45 degrees).
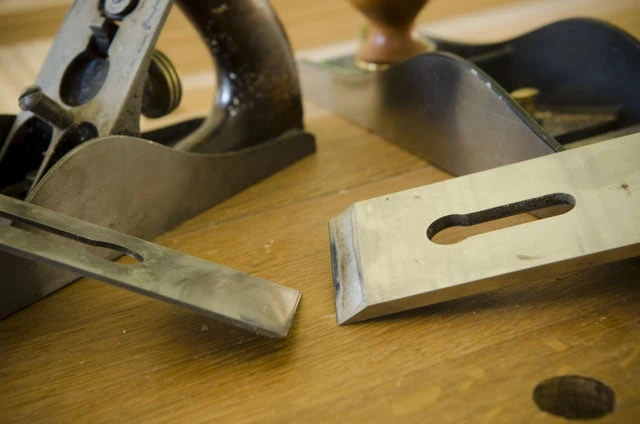
For softwoods and many hardwoods, a normal smoothing plane will work best, with it’s common 45 degree frog angle (and hence, the cutting angle). But for very hard woods (like tropical woods) or woods with figure, where the grain may not be coming toward the plane in a consistent direction, a blade set at a higher angle than 45 degrees is preferred. There are a few ways to get a higher cutting angle, which I’ll discuss below:
Option 1: Sharpen a Back Bevel on a Plane Iron:
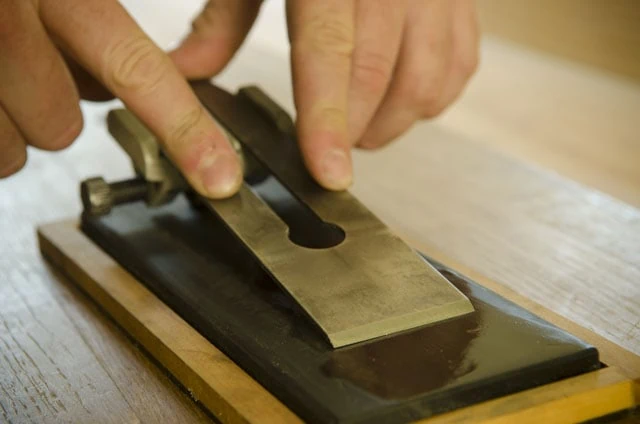
The easiest and most affordable option for handplaning figured wood is to simply buy a second handplane iron and chip breaker (often called a “cap iron”), and modify it for planing difficult wood grain.
Normal smoothing planes have the plane iron oriented bevel-down, usually with a 25 to 30 degree primary angle bevel. But for bevel-down planes, you can ignore the bevel angle for determining cutting angle. Since bevel-down plane irons sit flat against the “frog” (a movable bed for the blade), the blade cuts the wood at a 45 degree angle, which is the exact angle of the plane frog.
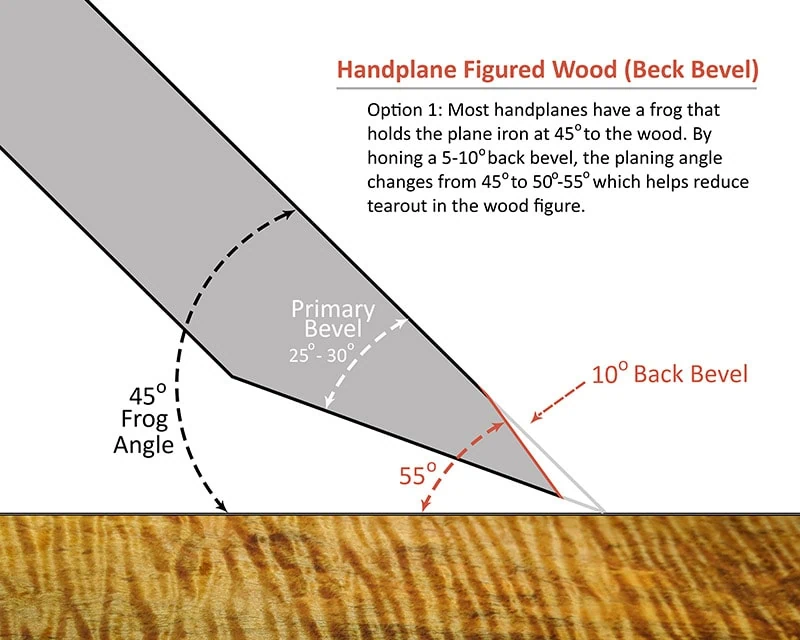
But by honing a 5-10 degree back bevel on the back of the blade (which is the leading edge, or cutting edge), the 45 degree angle of attack is raised to 50-55 degrees, relative to the wood surface, which is better for planing difficult grain and reducing tearout. It actually approaches a scraping cut rather than a pure shearing cut.
Changing the primary bevel from 25 to 30 degrees doesn’t have any effect on the angle that the blade cuts the wood. However, sharpening the primary bevel to 30 degrees will give the edge greater strength to withstand the added stress of planing with the new 5-10 degree back bevel. Or rather than changing the whole primary bevel to 30 degrees, you could instead add a secondary bevel of 30 degrees to the primary bevel. Hope that doesn’t confuse you!
So to clarify, for example, you could start with a normal plane iron that has a 25 degree primary bevel, then hone a 5 degree secondary bevel (for added strength), which would take the primary bevel up to 30 degrees. Then hone a 10 degree back bevel to raise the cutting angle to 55 degrees for planing the figured wood.
Where to Buy Replacement Handplane Blades?
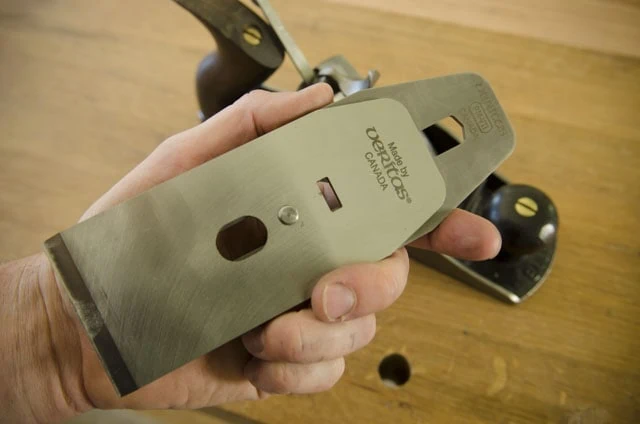
You can easily find vintage hand plane irons with chip breakers for your handplane on Ebay:
You can also buy aftermarket hand plane irons made for old Stanley and Record handplanes (often sold as “Stanley replacement blades” or “Record replacement blades”). If you can afford it, this option is better, since some newer plane irons and chip breakers are thicker and more rigid than the original vintage plane irons and chip breakers. The cheap ones are worse than the vintage plane irons and chip breakers. If you’re on a budget and can only afford one new plane iron and chip breaker, then I’d recommend that you purchase it as your primary planing iron setup, and then modify your old plane iron and chip breaker for planing figured wood, since you won’t use it quite as often. But if you can afford it, then go ahead and buy two new plane irons and chip breakers. Here are a couple options for nice, new, and thick replacement Stanley handplane irons:
- Highland Woodworking has the largest variety of higher-quality replacement handplane blades, which you can find here. They carry Hock blades, Lie-Nielsen blades, and a few other brands.
- Ron Hock was one of the first companies to develop replacement blades for old Stanley and Record handplanes, and they are very popular still. You can find his selection of replacement plane irons at the Highland Woodworking link above, or on the Hock Amazon store here.
- Lee Valley / Veritas sells nice plane irons and matching chip breakers for antique Stanley handplanes. You can find them here.
Option 2: Modify a Bevel Down Low-Angle Jack Plane for High Angles:
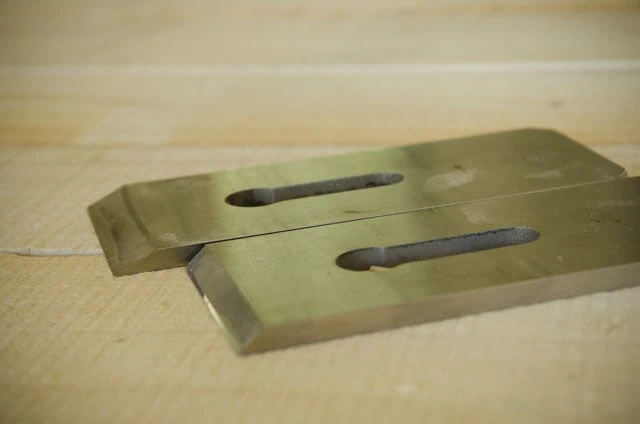
This second option may also sound confusing, but it is my method of choice for hand planing difficult figured wood grain: Buy a bevel-up low angle handplane (like this Lie-Nielsen No. 62 Low Angle Jack Plane). I know what you’re thinking: “why would I buy a low-angle handplane in order to get a higher cutting angle?”. Let me explain.
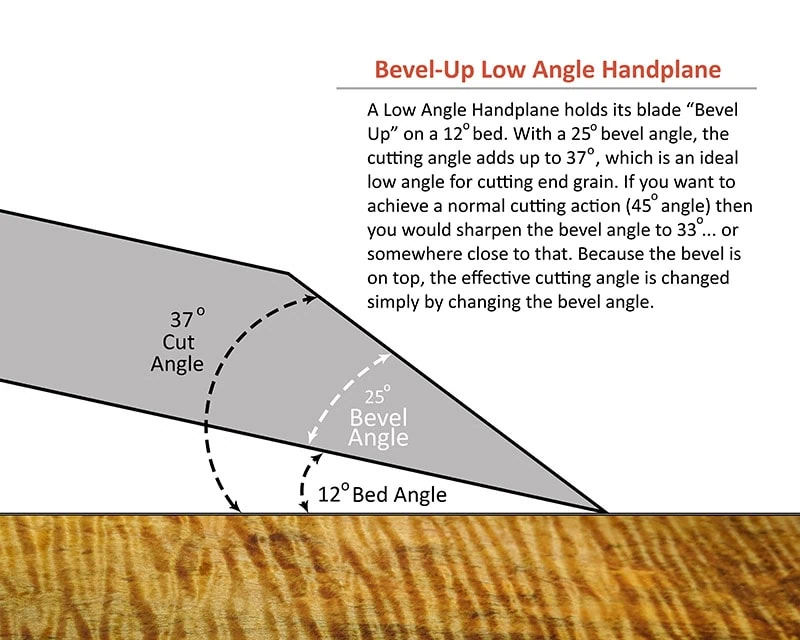
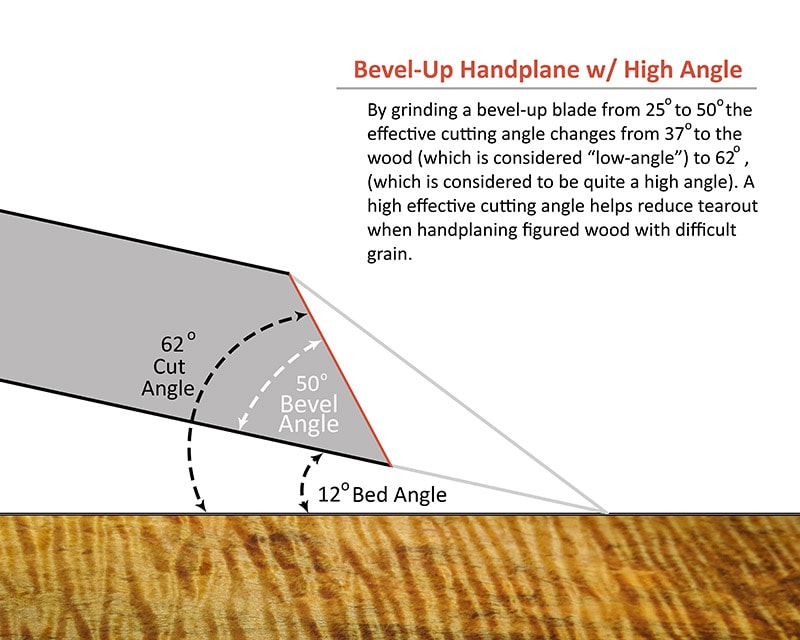
The bed of the low angle jack plane is 12 degrees. The plane iron usually comes sharpened at 25 degrees. Take 12 degrees + 25 degrees = a 37 degrees cutting angle, relative to the wood surface. A 37 degree angle is indeed considered to be a low angle, and ideal for handplaning end grain.
Rather than modifying my main plane iron, I purchased another bevel-up handplane iron from Lie-Nielsen (which you can find here), and ground it at a 50 degree bevel angle (from the factory 25 degrees). So a 12 degree bed angle + 50 degree plane bevel angle = a 62 degree cutting angle.
Sixty two degrees is a really good angle for difficult grain. This high angle is very close to a scraping cut which will greatly reduce the likelihood of tearout. I like this option because it allows me to have a handplane that works for low angle planing, high angle planing, and for normal planing. And to top it off, you can buy a toothing blade (like this one made for the No. 62) which can be used to rough-flatten very difficult and figured grain.
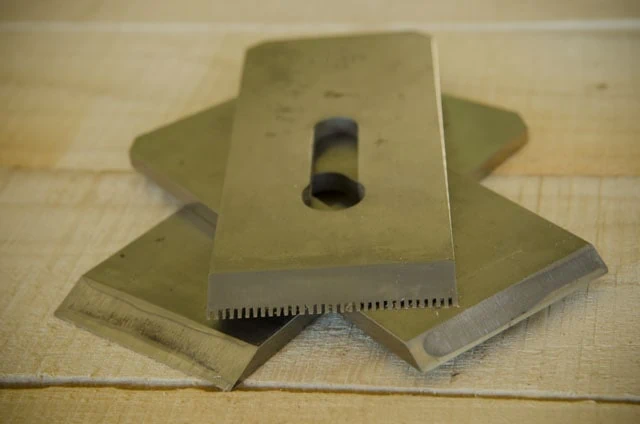
A setup like this is really cool, because you can’t modify a normal bench plane for low-angle use. Because bevel-up planes have the bevel as the leading edge, they are quite versatile: from low-angle to high-angle. A normal bench plane can only go higher from 45 degrees.
Option 3: Buy a High Angle Frog for your Smoothing Plane
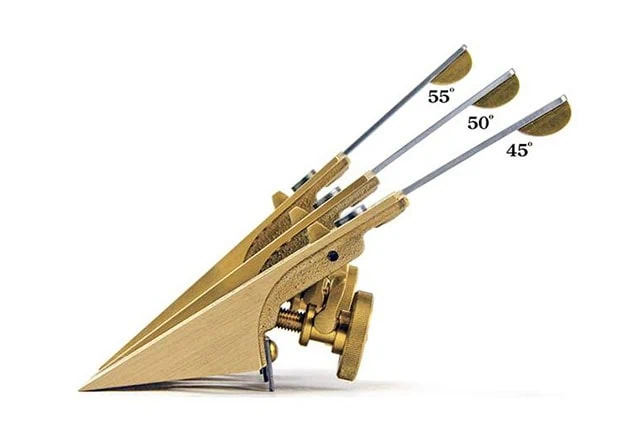
(Photo courtesy of Lie-Nielsen Toolworks)
The last option is to buy a handplane with a higher angled frog, like the one pictured above from Lie-Nielsen Toolworks. Or if you already own a Lie-Nielsen smoothing plane, you can buy a separate high-angle frog. Lie-Nielsen frogs come in three angles (45 degrees, 50 degrees, and 55 degrees) and run $75-$85, plus shipping. If you don’t already own a Lie-Nielsen bench plane, this is probably the most expensive solution, and not my favorite. And not every can afford an expensive Lie-Nielsen bench plane. Heck, I don’t even own one!
For more advice on buying smoothing planes and a low angle Jack plane, you can read my whole buyer’s guide that talks about which smoothing planes you should buy, so I will refer you to that page by clicking the button below:
Scraper Planes & Card Scrapers
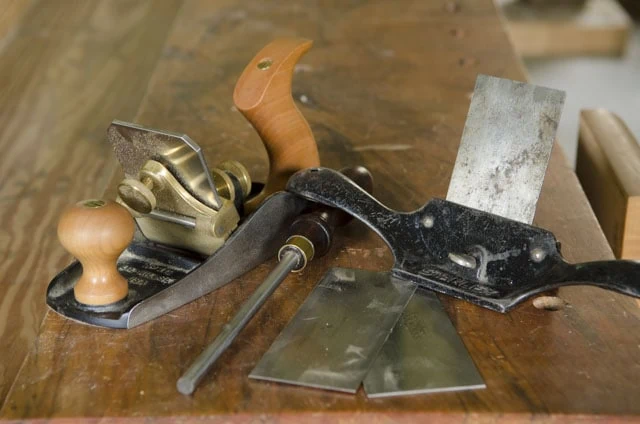
When a very sharp handplane isn’t good enough to smooth the surface of difficult wood grain, then the next step for me is to scrape the wood surface. This obviously doesn’t produce as smooth a surface, because of the very high angle of the blade or burr, but the hope is that at least the surface won’t tear out and cause ugly blemishes on your furniture. If you have just a small area to scrape, then a card scraper is the obvious choice. But for a large surface, a card scraper will leave shallow valleys (kind of like ice cream scoops) and it will leave your hands exhausted. A scraper plane remedies both of those issues. But, both scraper planes and card scrapers have a learning curve, which can frustrate some woodworkers.
Buying Scraper Planes for Difficult Grain
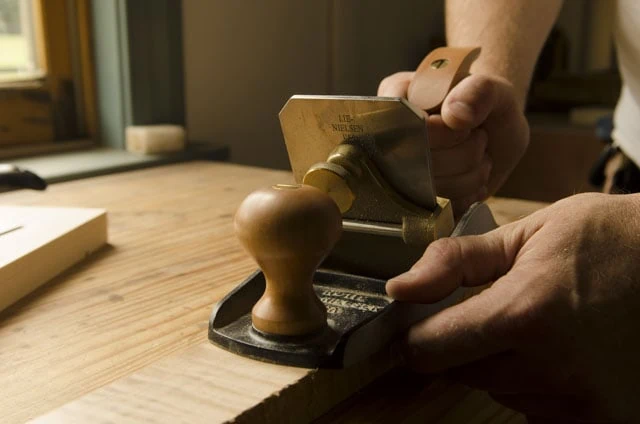
Scraper hand planes give a woodworker a very high angle of attack for flattening and smoothing wood with difficult or figured grain. This is accomplished with a scraping cut rather than a shearing cut. The most common vintage scraper planes are:
-
- Vintage Stanley No. 112 scraper plane (find it here on Ebay)
- Vintage Stanley No. 80 hand scraper (pictured below. Find it here on Ebay)
- Vintage Stanley No. 85 cabinet maker’s scraper plane (find it here on Ebay)
- Vintage Stanley No. 12 scraper plane (find it here on Ebay)
- There are also other vintage scraper planes by various makers (see them here)
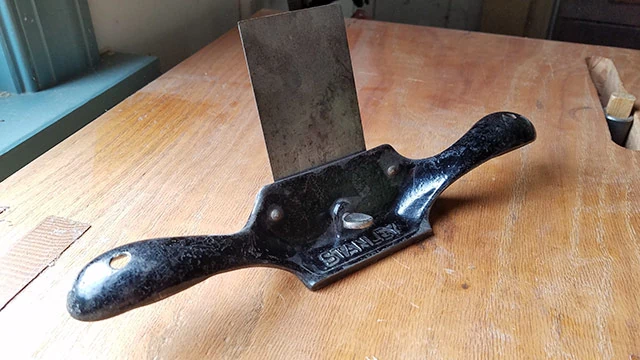
Scraper planes are difficult enough to master when they are new, so unless you’re excited to learn a lot about rehabbing, tuning & using scraper planes, buying a new scraper plane may be right for you. Then you just have to learn how to sharpen it and use it. And due to the rarity of certain scraper plane models, some of the vintage scraper planes are more expensive than the new versions.
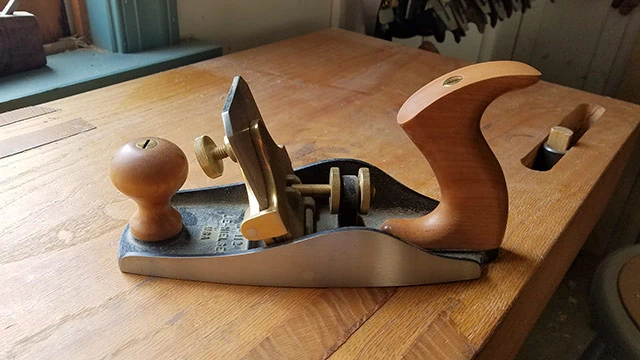
Lie-Nielsen Toolworks has remade the the Stanley No. 85 Cabinet Maker’s Scraper plane, which is better for medium to small surfaces (find the No. 85 here) and the No. 112 Large Scraper Plane, which is better for larger surfaces like tables or workbenches (findthe No. 112 here). You can also sometimes find them used on Ebay (see them here) but they may not cost much less than new scraper planes. Because of the large surfaces I’ve needed to scrape, I own the Lie-Nielsen No. 112 scraper plane. I also chose the Lie-Nielsen No. 112 scraper plane because it has an adjustable angle blade, whereas the No. 85 Cabinet Maker’s scraper plane has a fixed blade angle. Sometimes you need to dial in a specific, unknown angle to scrape a particular wood grain, which the No. 85 plane wouldn’t allow you to achieve. The No. 112 large scraper plane allows you to experiment and adjust the blade angle until you get an angle that works best.
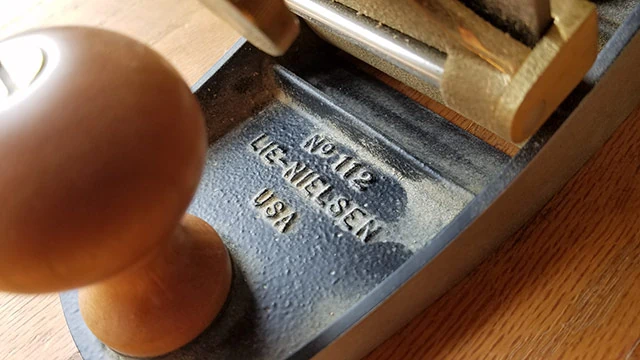
Lee Valley also sells a No. 112 scraper plane, which I haven’t used (find it here). Below you can watch Lie-Nielsen’s videos on their scraper blades to help you see which scraper plane is right for you:
Buying Card Scrapers for Difficult Grain
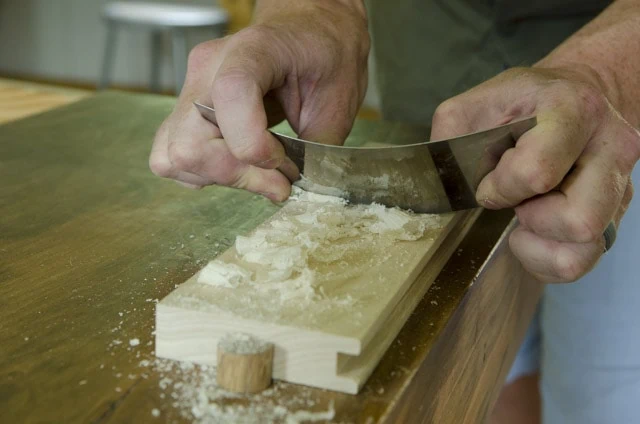
As mentioned above, card scrapers are mainly used for smoothing smaller areas of difficult grain on your wood surface. They’re also a really great hand workout, because as you push the middle of your thumbs against the thin metal card over time, it really works muscles you haven’t worked before. But really, this is the kind of exercise that hurts, so I just limit it to small areas of difficult grain.
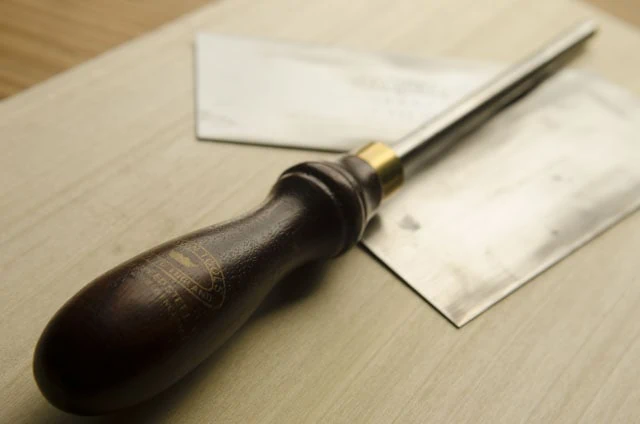
Card scrapers work by scraping the wood with very small burrs turned on the edge of the metal with a burnisher (hardened metal rod). Card scrapers come in different thicknesses, shapes, and some come with the edges already “prepared”. But “prepared” edges aren’t necessary, because you’ll learn how to do that below.
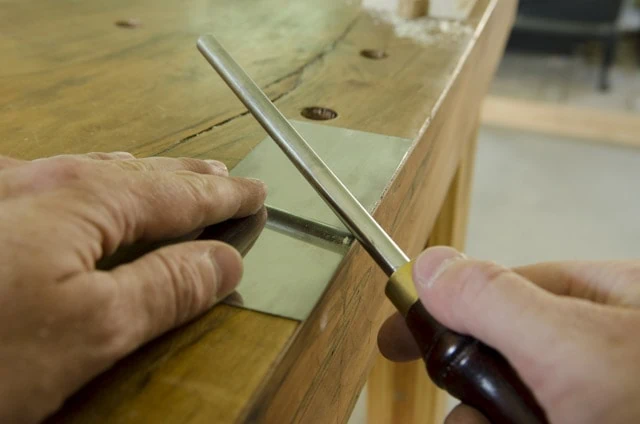
A lot of people have struggled with properly sharpening a card scraper, which involves “turning a burr”, so that they can achieve fine shavings. Fear not, because below you can watch Windsor Chair maker, Elia Bizzari demonstrate his simplified method for sharpening a card scraper.
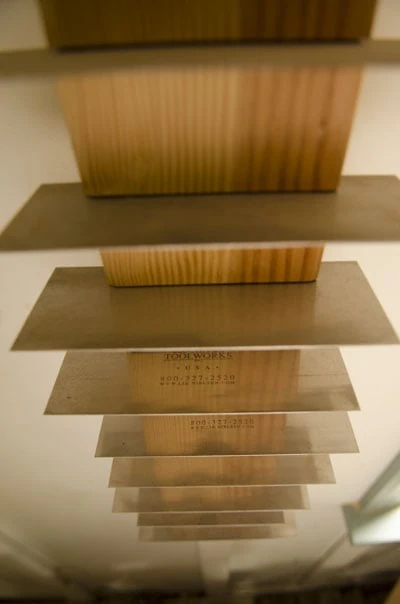
Most brands of card scrapers will work fine, but I prefer using thinner, more flexible card scrapers, which aren’t as difficult to bend with my thumbs. But some people prefer thicker card scrapers. That’s something that you need to experiment with. In my woodworking school I have a rack of different thicknesses of card scrapers for different situations and for different student preferences. But I feel that the best card scrapers are the Lie-Nielsen card scrapers. You can buy this set of two Lie-Nielsen card scrapers here, so you can have two different scrapers for different situations. The set comes with a moderately stiff card scraper (0.032″ thick) for general flat work and a thinner, more flexible card scraper (0.020″ thick) for more curved surfaces. They don’t carry the really thick card scrapers. Here are links to other card scrapers and products used for card scrapers that will assist you in getting started scraping and sharpening your card scraper:
Buying Abrasives / Sandpaper
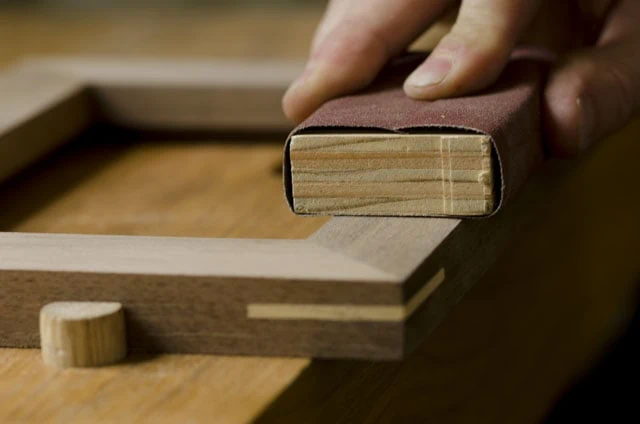
Any “purist” woodworker who degrades sandpaper as non-historical, just needs to dive a little deeper into their history books, because the use of abrasives goes back to ancient Egypt, and maybe beyond. One of the earliest known abrasives used by furniture makers was shark skin. Now we have so many types of abrasive that it’s very hard to keep up with. Although sandpaper is historical, it doesn’t mean that it’s the first method that I use for smoothing my furniture surfaces. In fact, as mentioned above, it’s usually the last resort. If the wood is cooperative, then I can handplane the surface of a small furniture piece with just a few passes of a smoothing plane, whereas with sanding I have to get my respirator on, hook up the dust collection (if using an orbital sander), and move through a number of sandpaper grits to get the desired result. And the finished surface still doesn’t usually look as nice as a handplaned surface. But like I mentioned above, sometimes a handplane or scraper just won’t smooth some difficult grain without tearing out. That’s when I turn to sandpaper. And sometimes I do the best I can with a scraper, and then finish up with some finer grits of sandpaper. And with curved furniture pieces, sandpaper is often the first choice for me.
Which Sandpaper is the Best for Woodworking?
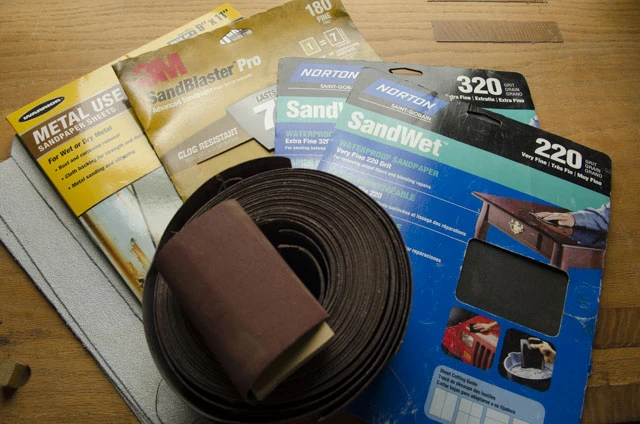
Sandpaper is simply abrasive grit media adhered to paper for smoothing wood and other materials. So which sandpaper is the best to buy? The answer isn’t all that simple. Here are a couple things to consider:
- There’s a trade off between quality and cost. If a certain sandpaper brand lasts twice as long as another brand, but costs three times as much per sheet, is it really worth buying the better brand? Woodworkers also need to consider if they plan on hand sanding or sanding with power tools.
- Comparing sandpaper brands is like comparing apples to pears. Even though grit size, abrasive type, and sometimes adhesive type are often printed on the back of sandpaper, there isn’t one standard convention for comparing these differences. So it can get confusing. Even for me. Below is how I simplify sandpaper in my mind:
Different Types of Sandpaper
As previously mentioned, different types of abrasive have been used for furniture making over the centuries, including shark skin and real sand (or “Garnet”) glued to paper. But now it’s more common to see man-made synthetic abrasives, like aluminum oxide (the most common), silicon carbide, and ceramic abrasives.
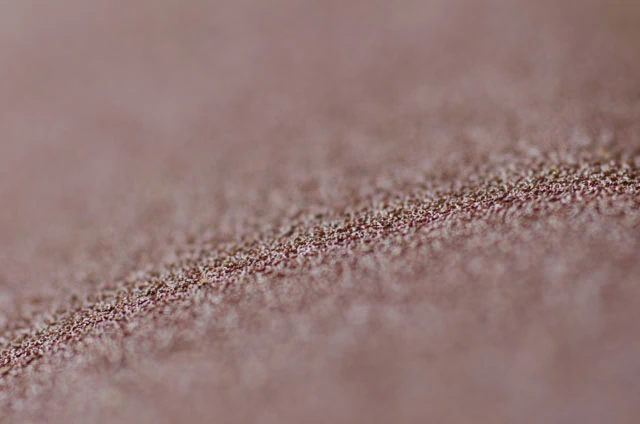
Aluminum Oxide Sandpaper
Because of it’s longer lasting grit, aluminum oxide is often thought of as the best type of sandpaper for bare wood, and comes in different grades, the cheaper of which break down faster than the higher quality heat-treated aluminum oxide sandpaper.
Silicon Carbide Sandpaper
Silicon carbide sandpaper doesn’t work very well on bare wood, as it dulls too quickly and is meant more for metal, glass, and plastic. I often use it on the metal parts of hand tools. But it does work well when sanding between coats of finish because it gives a uniform scratch pattern.
Garnet Sandpaper
Garnet abrasive is used in the cheaper, orange sandpaper that I was used to buying in my younger days. Garnet paper does wear down faster, but can give a finer finish.
Ceramic Sandpaper
I rarely use ceramic sandpaper for hand sanding, as it is a very strong, long-lasting and aggressive abrasive. It’s more used for major wood shaping with power sanders. Since I do most of my wood finishing and shaping with hand tools, I usually don’t have need for ceramic sandpapers. However, I have successfully used ceramic-type sandpaper on granite for flattening handplane soles.
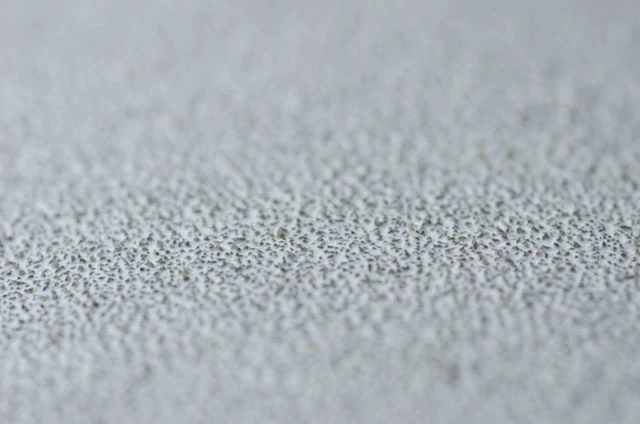
Because I try to use handplanes and scrapers as much as possible, I don’t typically do much finish sanding with my orbital sander or belt sander (yes I own both), so I won’t discuss the in-depth subject of those types of sandpaper.
When I buy sandpaper, I usually purchase it and use it in the following grits: 60 > 80 > 150 > 180 > 220 > 320 (sometimes). Using sandpaper in a sequence like this allows you to satisfactorily remove the scratch patterns of the previous grit. Here are some buying options for sandpaper for woodworking:
- Norton (who makes my water stones) also makes nice aluminum oxide sandpaper, and I often buy their black wet/dry sandpaper for finer sanding and wet sanding. You can check prices on Norton sandpaper here. Norton’s 3x sandpaper (find it here) is thought to be the best sandpaper on the market right now, because it cuts faster and lasts longer.
- 3M is one of the top brands of sandpaper manufacturers for woodworkers, and you can find their selection here. I prefer aluminum oxide sandpaper.
- Here is a selection of wet and dry sandpaper. Just make sure that it is for wood, and not for metal (unless you want to sand metal).
- Here is a wide range of aluminum oxide sandpapers for you to look at. Check out the reviews and see what other woodworkers are saying.
Buying Steel Wool:
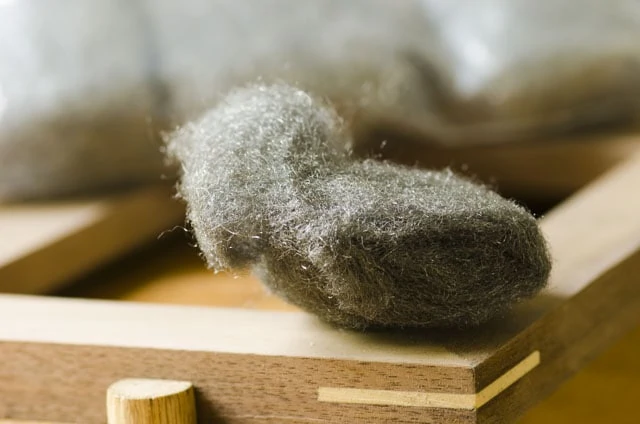
I do also use fine steel wool for finishing wood furniture, but not for applying the finish. I often use fine steel wool for sanding between coats (to level and smooth the finish surface), for rubbing out the final coat of finish, and for applying wax over the top of my topcoat. I also use it for cleaning and waxing antique furniture. For sanding between coats, I use a fine #000 steel wool (pronounced “triple aught“, and roughly equivalent to 280 grit sandpaper). For rubbing down the final cured topcoat with wax I use very fine #0000 steel wool (pronounced “four aught“). The latter is roughly equivalent to 400-600 grit sandpaper. I usually buy my steel wool on Amazon for under $4 for 12 pads (includes free shipping), which is ridiculously cheap! Here is the Rhodes brand #0000 steel wool that I buy which is very popular with most woodworkers. This Liberon #0000 steel wool is also popular with woodworkers, due to less machine oil, but it’s a little hard to find in small quantities. Steel wool is acceptable to use with oil-based finishes, shellac, and solvent-based lacquers, but shouldn’t be used on water-based finishes or paint, as any remaining metal fibers or oil can hurt these finishes.
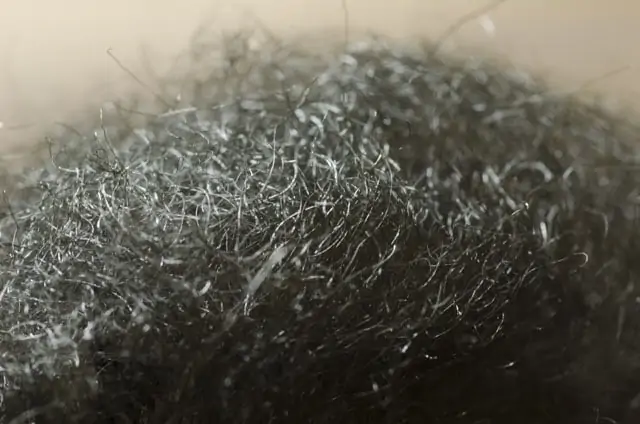
And I just have to share this awesome video on how steel wool is made:
Buying Abrasive Pads:
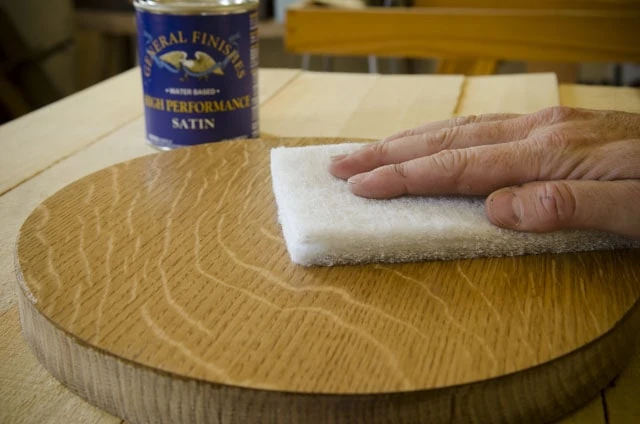
As mentioned above, if you plan on using a water-based finish or paint, then don’t use steel wool between coats, as it can rust. Try using Scotch-Brite plastic abrasive pads (or equivalent from another manufacturer). Steel wool can also leave behind small metal fragments in hard to reach spots, which will need to be cleaned or blown off before applying another coat of wood finish. Abrasive pads do also leave behind some particles, but it is easier to remove. Abrasive pads also last longer than steel wool pads. However, they cost quite a bit more than steel wool, they don’t get into contoured details as well as steel wool, and they don’t leave quite as good of a finish as steel wool (steel wool levels the finish by cutting, whereas abrasive pads tear it). Most manufacturers of abrasive pads have kept with 3M’s original coloring system:
- Green = 100 grit sandpaper (this 20 pack is the best value I’ve found, for $13.57)
- Maroon = 180 grit sandpaper
- Gray = 280 grit sandpaper
- White = Somewhere above 600 grit sandpaper (I just found this 20 pack on a big sale for $8.27)
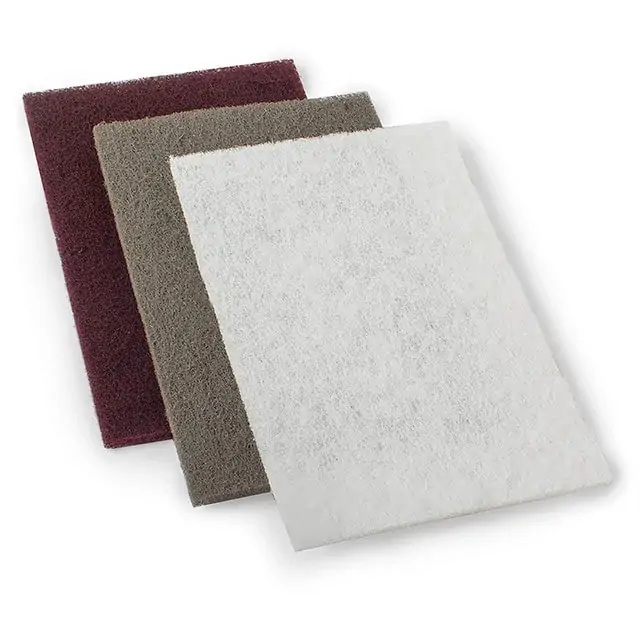
You can find a wide assortment of abrasive pads on Amazon, which you can find here. I find white abrasive pads and gray abrasive pads to be most useful. Gray abrasive pads are good for sanding between coats of finish, and white abrasive pads are good for sanding down the final topcoat, after it has cured. The maroon and green abrasive pads are useful for rust removal on your woodworking hand tools and woodworking machinery. Using wax, start with green > maroon > gray > white.
Buying Wood Fillers, Wax Sticks, and Grain Fillers
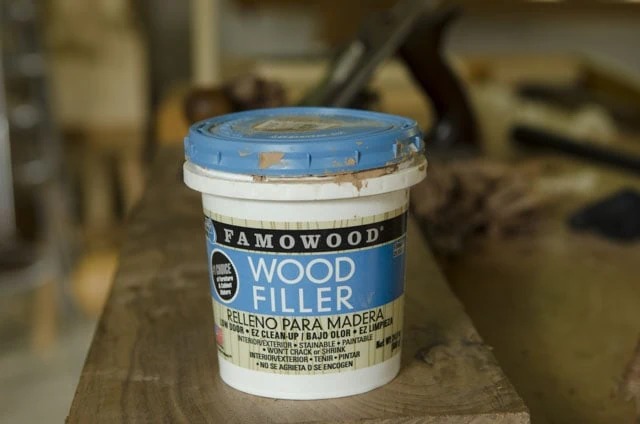
Sometimes you discover a flaw in a piece of furniture that you’ve built, and need a little help. Sometimes you find little gaps in your molding’s miter joints. Or sometimes you just need to fill small nail holes. This is where tinted wood filler or wax sticks come in handy. For large gaps, you should add wood, but for small gaps or nail holes where wood can’t be glued in, a wood filler or wax stick will help.
If you’re using wood filler, make sure to choose a wood filler that will accept handplaning, sanding, staining, and dyeing. The above Famowood woodfiller has worked fine for me, and can be found here for about $12. Wood filler should be used before handplaning, sanding, staining, dyeing, etc.
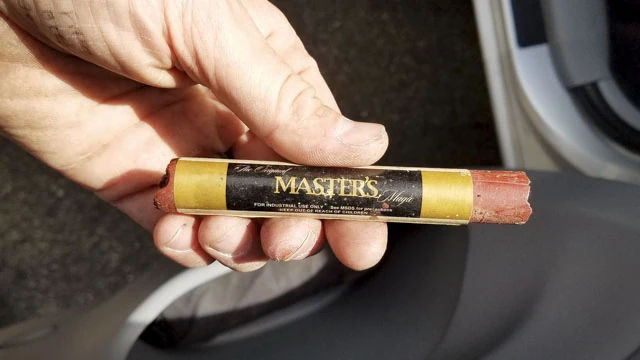
Another product for filling small gaps or nail holes on your furniture is wax filler sticks. Unlike wood filler, wax sticks should be used after the finish is applied, and are carefully matched to the final wood color. Here are some purchasing options for wax filler sticks:
- Master’s Magic brand wax sticks: this is preferred by professionals, and if you can find them at a local distributor, the wax sticks aren’t too expensive (under $3 each). You can also find them through the Gemeni website (here). But their shipping is quite expensive, which isn’t economical if you only need a couple wax sticks. You can check here to see if a dealer carries these wax sticks near you.
- Minwax Blend-Fil repair pencils: These pencils are another great option that professionals use (though not as preferred as the Master’s Magic wax sticks), and work for filling nail holes and small gaps. You can find them here.
- Check here for other brand wax sticks
Rather than trying to exactly match the shade of wax stick to your furniture, try going one shade darker so it won’t stand out.
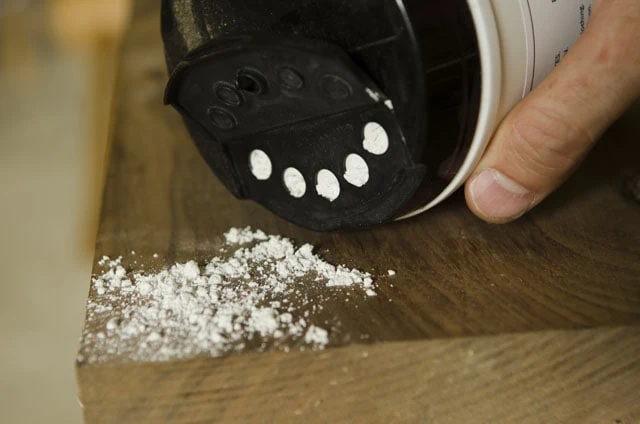
Now for wood grain filler: I typically like to show the structure of the wood grain, with penetrating finishes, but some people prefer a glossy smooth surface, like on pianos or other high style furniture styles. Close-grain woods (like maple or cherry) will be filled with a few coats of finish, but in order to fill the gaps of the grain on open-grained woods (like mahogany, oak, or walnut) a wood grain filler is required.
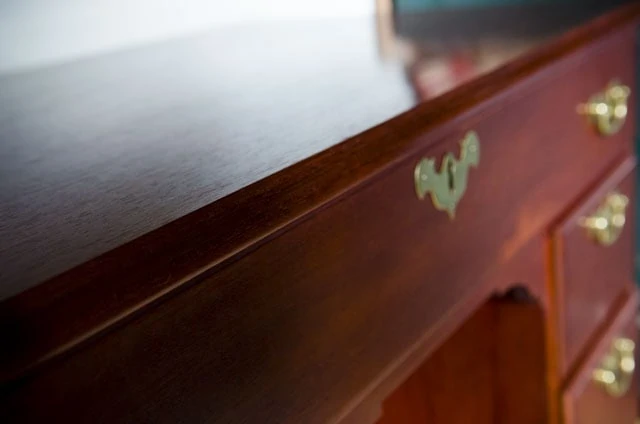
There are myriad commercial wood fillers and wood grain fillers on the market:
- See wood fillers and wood grain fillers at Highland Woodworking
- See wood fillers at Rockler Woodworking
- See wood fillers at Amazon
Another option is to use the historical method of making a wood grain filler by making a slurry of boiled linseed oil and pumice stone powder. Boiled linseed oil can be found at almost any hardware store (or here at Amazon if your store doesn’t carry it), but pumice stone powder is harder to find locally, but easy to find online. Here are some sources that I’ve used:
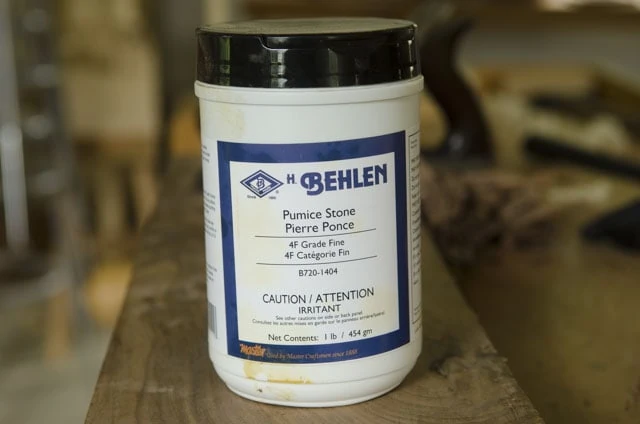
Another option, that you can research, is to use plaster of paris in place of pumice stone. I haven’t used it, but have heard that it is an acceptable option to pumice stone.
Buying Wood Dyes & Wood Stains
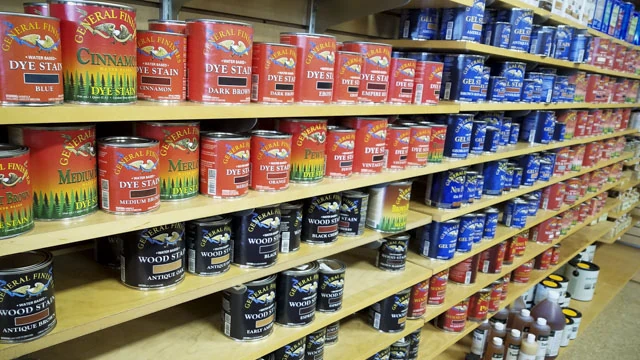
Woodworkers use Dyes and Stains to change the color of their wood furniture prior to applying a topcoat, and also to bring out wood figure and wood grain. And some stains contain a topcoat mixed in. So what’s the difference between wood dye and wood stain?
What is the Difference Between Wood Dye and Wood Stain?
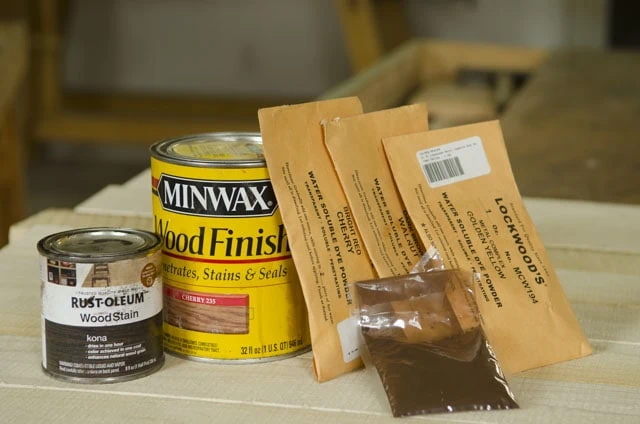
Wood stains and dyes are both useful, and both accomplish different things, and can sometimes be used together. Most wood stains usually have stronger coverage, and can often be used to change the entire color of the wood surface (it’s like watered-down paint). Due to it’s strong color pigments, wood stain is better than dye at highlighting the wood grain, although it is poor at highlighting the wood figure (on quilted maple, for example), and can muddy the wood figure. The pigments in wood stain lodge themselves in the wood grain and pores. Wood stains are also not great at adding even color to the wood. Wood Dyes, on the other hand offer a more subtle change in color, and help enhance the wood figure, giving it more contrast, or “pop” and “chatoyance” (a 3D translucence). Wood dyes don’t have large color pigments as stains do, but have microscopic particles. Wood dyes were originally made by soaking natural materials (like berries, barks, roots, etc.) but the colors would fade over time. A process to maintain the colors was developed in the late 1800’s, which became known as aniline dyes. Now dyes are “lightfast” and don’t fade as much as they used to.
If you’re looking to bring out contrast in the wood grain, then dyes aren’t as good as wood stains. But because wood stains are good at highlighting wood grain, they are also good at highlighting any flaws in your wood surface, like tearout and scratches, so prepare your surface well if you plan to use stains.
Wood stains work better on open-pored woods (like Oak), but poorly on closed-poor woods like maple. That’s where dyes excel. But I typically don’t like over-accentuating wood grain on oak (it reminds me of the furniture from the 1980’s and 1990’s), but I love accentuating wood figure on figured maple, so wood dyes are usually what I prefer in most coloring situations. I do, however, like using mild oil stains on white pine.
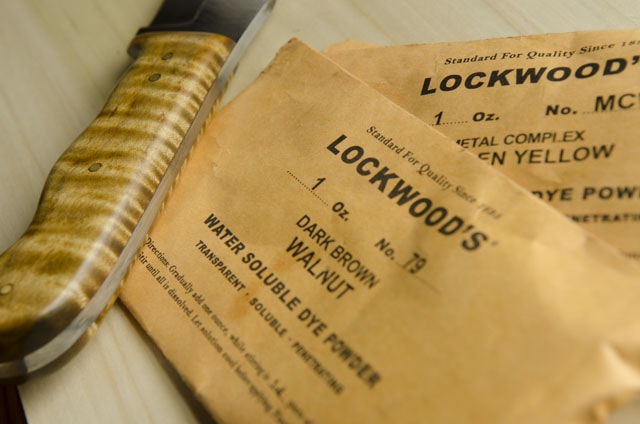
In addition to helping the wood figure stand out, dyes carefully help to replicate the aging color and patina seen on antique furniture. Wood dyes are quite versatile, and allow you to really dial in specific colors. As you can see in the knife handle below, I used a blend of two dyes, which brought out the darker wood figure and gave an antique yellowing to the figured maple.
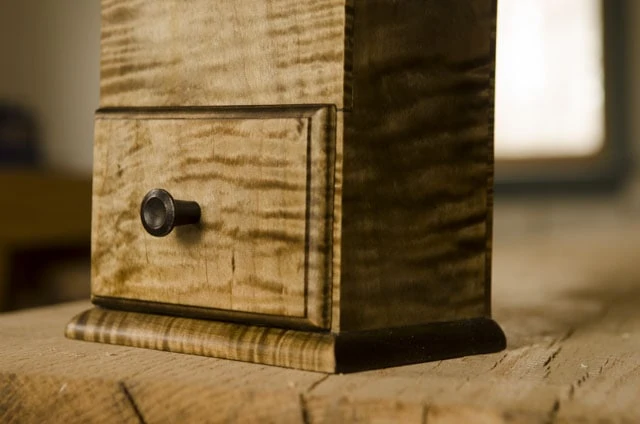
And then in the below candle box, I used a similar dye to bring out the wood figure, but then a brown dye to give the maple a nice, subtle walnut shade. I was going for a quilted walnut look.
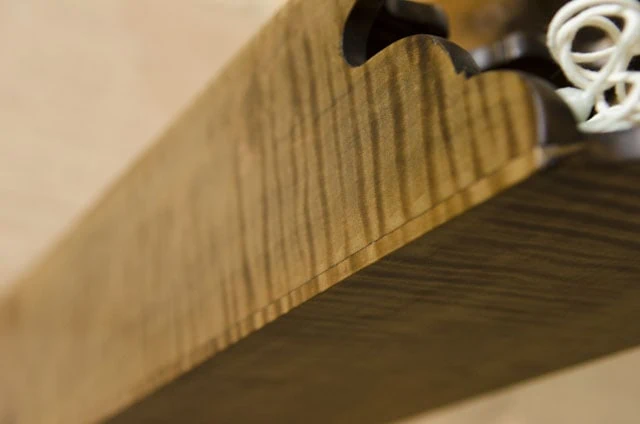
Dyes come in both powder form and pre-mixed liquid form, but powder dyes are less expensive, have a larger variety of colors to choose from, and are easier to customize by mixing dyes and changing concentration for stronger or more subtle effects. Options also include water-soluble dyes, alcohol-soluble dyes, and oil-soluble dyes. Due to it’s safety, clarity, and ease in mixing & application, most woodworkers buy water-soluble powder dye for most situations.
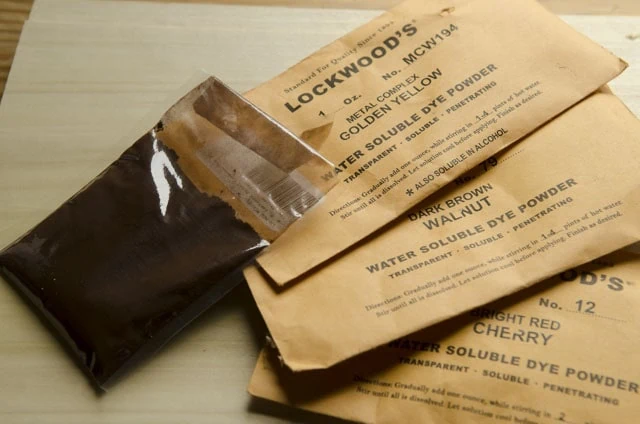
The powdered wood dye that I typically use is made by W.D. Lockwood & Co, which is more affordable and has more colors available than competitors. Lockwood dyes are water-soluble, and some are also alcohol-soluble. Dye powders mixed with alcohol dry much faster and don’t raise the wood grain. However, water-soluble dyes don’t really raise the grain much, and most woodworkers are more comfortable working with water than with alcohol. But there are other excellent and popular aniline dyes on the market, which I list below.
Which Wood Dyes are Best?
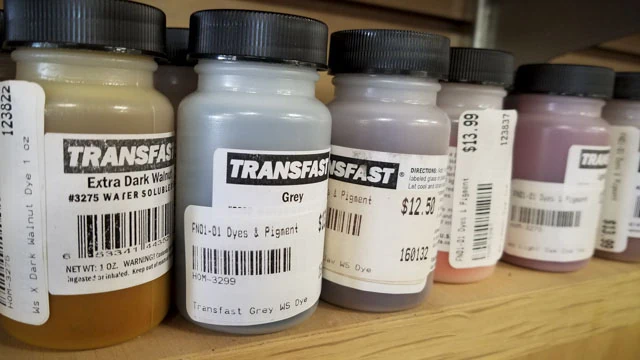
- TransFast dyes were developed by Jeff Jewitt, a well-known furniture finisher and restorer, and are a popular choice with a wide array of colors. TransFast dyes can be purchased here on Amazon or at WoodCraft retail locations.
- J.E. Moser’s also produces an extensive high-end line of wood dyes, which can be found here on Amazon.
- Lockwood water-soluble aniline dyes (which I mentioned above) can be found here at Tools for Working Wood. If you buy just one 1 oz. packet, then the price (with shipping) is about the same price per ounce as the above dye brands. But if you buy more than one packet (which I usually do), the cost drops significantly, since the packets are under $7 each and it doesn’t cost extra shipping to ship more packets.
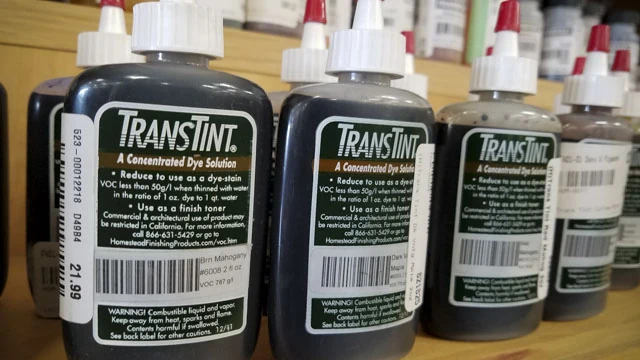
- TransTint dyes, also developed by Jeff Jewitt, comes in liquid concentrate form, and is more expensive per unit, though about the same cost as TransFast for the final dye product. It is both water-soluble and alcohol soluble. It is more limited in color combinations than by mixing a powder, but it still a very popular dye. TransTint dyes can be purchased here on Amazon.
As I mentioned above, I don’t usually use wood stains very often, as wood dyes are my preference. But I do have a great article to share, published by Bob Flexner, called “Understanding Stains.” Bob is the author of the very popular book on wood finishing, that most woodworkers have heard of: “Understanding Wood Finishing.” In the article, Bob discusses the four main types of wood stains:
- Oil stain
- Varnish stain
- Water-based stain
- Gel Stain
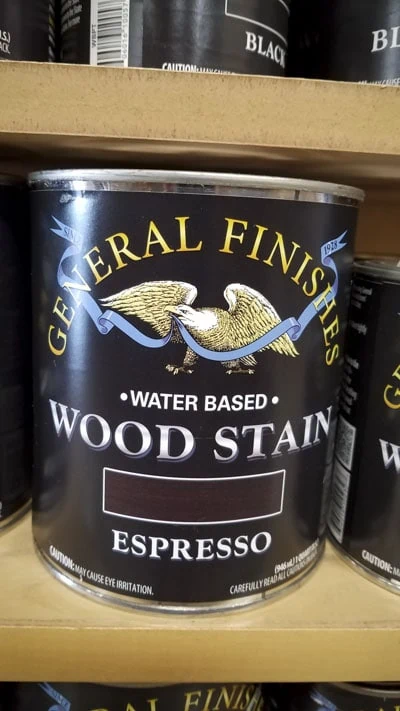
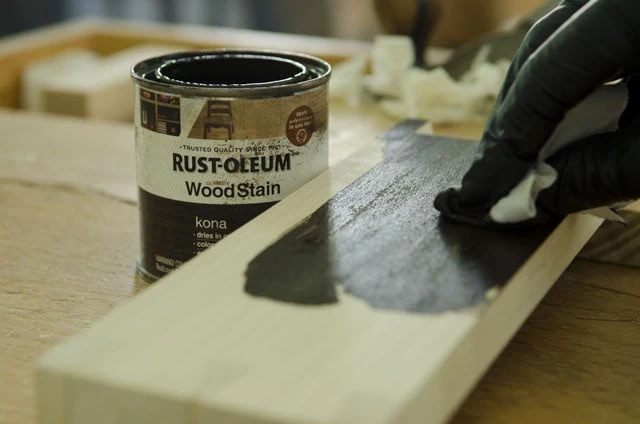
General Finishes is probably the most popular maker of stains for serious woodworkers, especially their gel stains and water-based wood stains. You can find many of their stains here on Amazon, and often at local woodworking stores, and occasionally at smaller hardware stores. Home Depot has wisely started carrying General Finishes, but I don’t think they carry it in many of their actual stores yet (at least not the ones near me), but they do ship from their website. I have had some success with Minwax stains and sometimes Rust-Oleum Stains, and years ago I saw some professionals have success mixing Olympic oil stains for pine furniture, though I believe Olympic only focuses on outdoor deck stains now.
